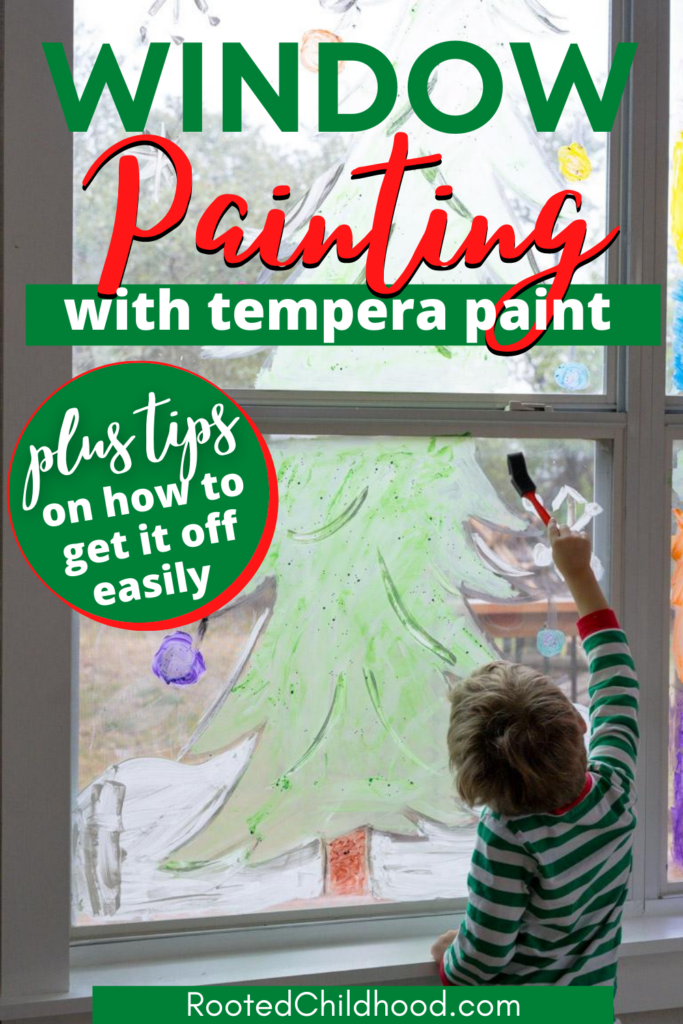
Want to try window painting for kids? It’s so much fun and really not as messy as you might think! Scroll down for tips and tricks on making window painting a super fun and memorable activity for the whole family, plus the most important thing- how to get it off!
Our window painting tradition
We have an annual tradition of doing a Christmas window painting that began back when we started using A Year of Playing Skillfully from The Homegrown Preschooler, and it has become something we look forward to all year long.
Full credit for this idea goes to the lovely ladies at The Homegrown Preschooler, but I get a lot of questions about it so I thought I’d share some tips and tricks we’ve learned.
But first, I’ll tell you a little story about why I love this curriculum and why I need some hand holding when it comes to messy, process art.
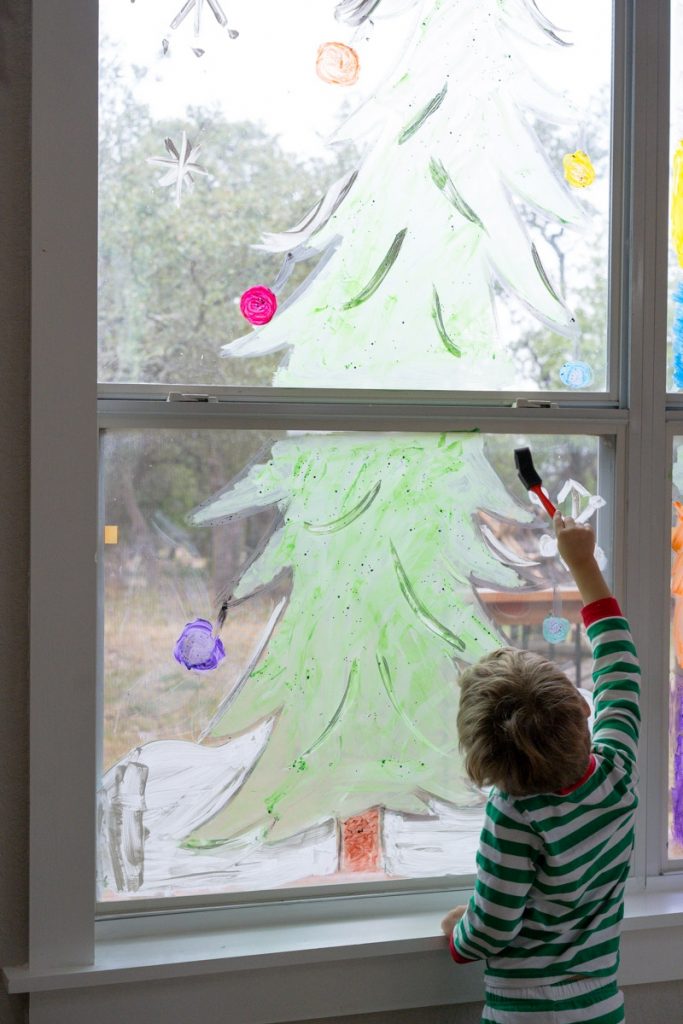
Our windows last year looked so great, and we’ve all been excited to work on this year’s project. I’ve been search for design ideas and decided that we’d do a lovely winter scene that would fit the decor of the rest of our house. A snowy field of evergreen trees with a sweet deer- it was going to be beautiful! I found an image to use, got the projector ready to shine it on the window so I could trace it, and then I’d let the kids fill it in.
Well, I was getting all ready and my 7 year old started whining and complaining. Then my 4 year old jumped in too. “I want a Christmas tree!” “Why can’t we just do the same one we did last year?” “I want bright colors!”
I had to stop for a minute and realize that I was stealing the joy from this project by trying to make it picture perfect. They didn’t need a projected image for a perfectly drawn deer, they didn’t care if it didn’t match our living room. They just wanted to have fun doing it.
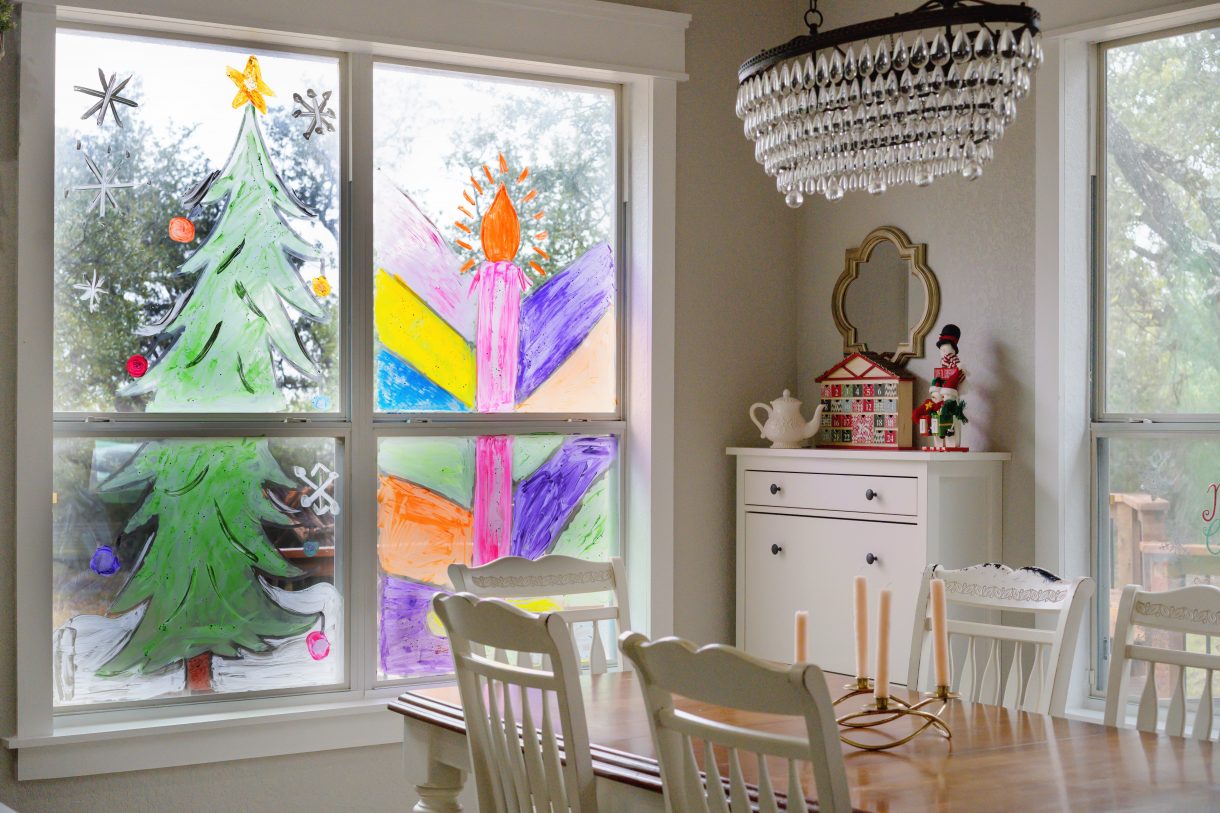
So I took a deep breath, I said “yes” and let my daughter take the lead. We recreated last year’s scenes and they are beautiful, even if it isn’t the picture perfect winter scene I envisioned.
Prepare for your window painting
Choose a Window
First, pick a window or sliding glass door that you won’t mind having covered for a long time. Your kids will not want to wash this off right away! We made a rookie mistake the first time and the main windows in our living room and then our house was so dark for a month. So choose wisely!
We went with a window in our dinging room this year and planned to leave a little bit of the glass open so we could still get some light.
Have a Game Plan
One year I spread the paint out on paper plates and let the kids start painting. I’ll let you imagine how that went…yeah, I had a one year old covered head to toe in purple paint.
Having large amounts of paint in your living room isn’t an everyday occurrence, and it’s wise to think about how you will contain it and manage multiple children to ensure you have a bit of sanity when it’s all done. Unless you’re an amazing, messy, let-the-kids-loose kind of mom. Then by all means just put it out there on a plate and let them have at it.
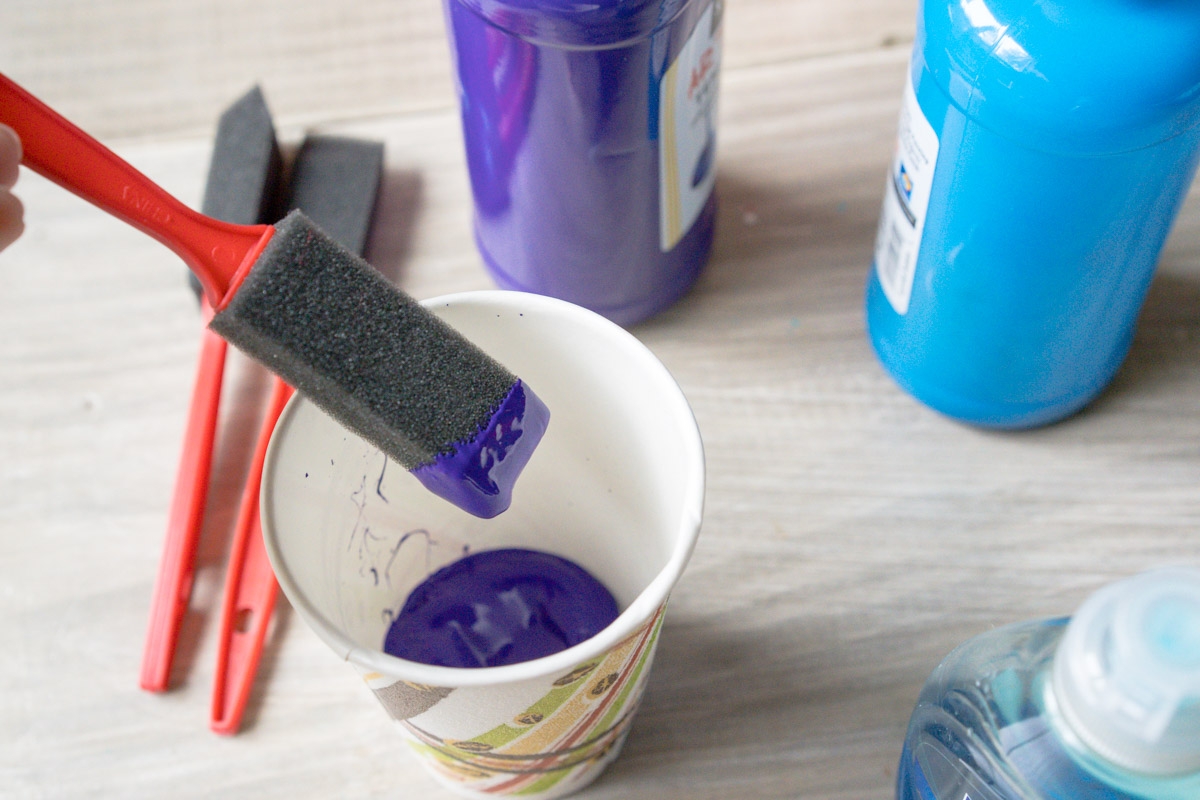
But if you’re like me and need a bit of structure to the activity, I’ve found that using disposable cups for the paint works best. I put one foam brush in each cup and that way there was no color mixing and the kids could hold the cups without touching the paint.
I also planned around nap time this year so that my messiest little munchkin was napping during most of the project.
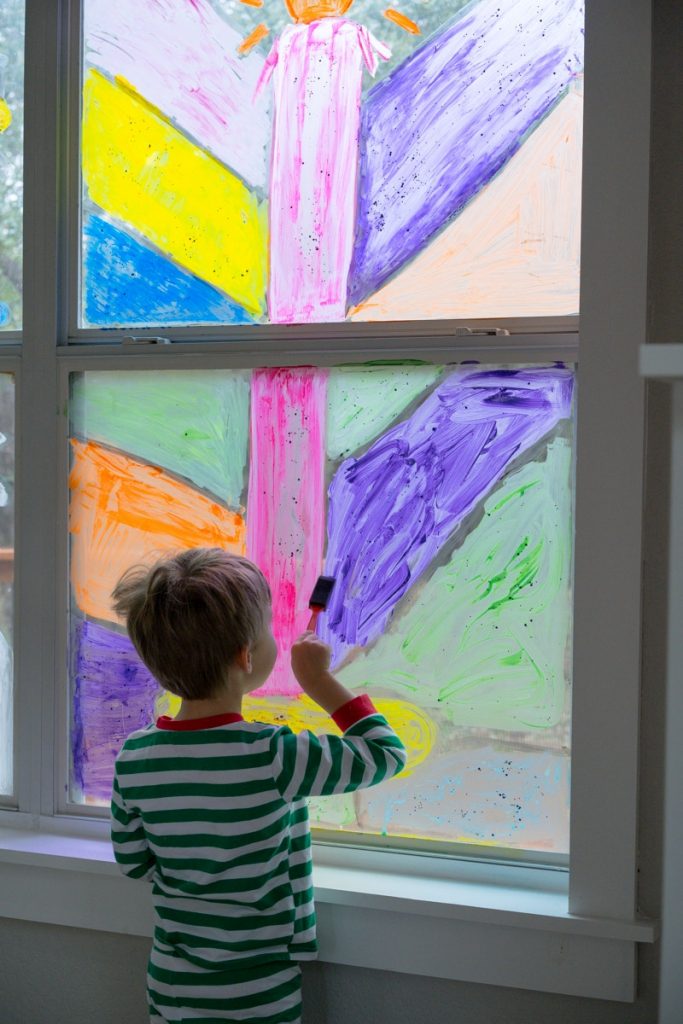
If you have younger children, you may also want to consider the design you will do. When my kids were all under 6, I outlined the design and let them fill it in. If you’re more of a free spirit you could totally just let them do their own designs but I was aiming for something a little more polished that we could enjoy as art for the season.
Gather Supplies
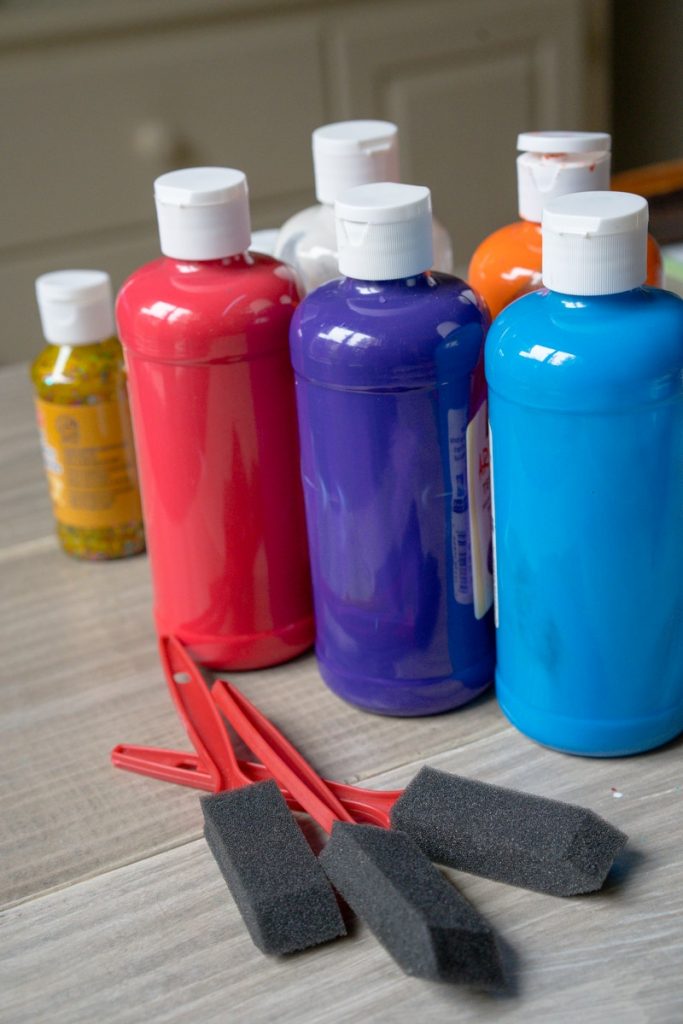
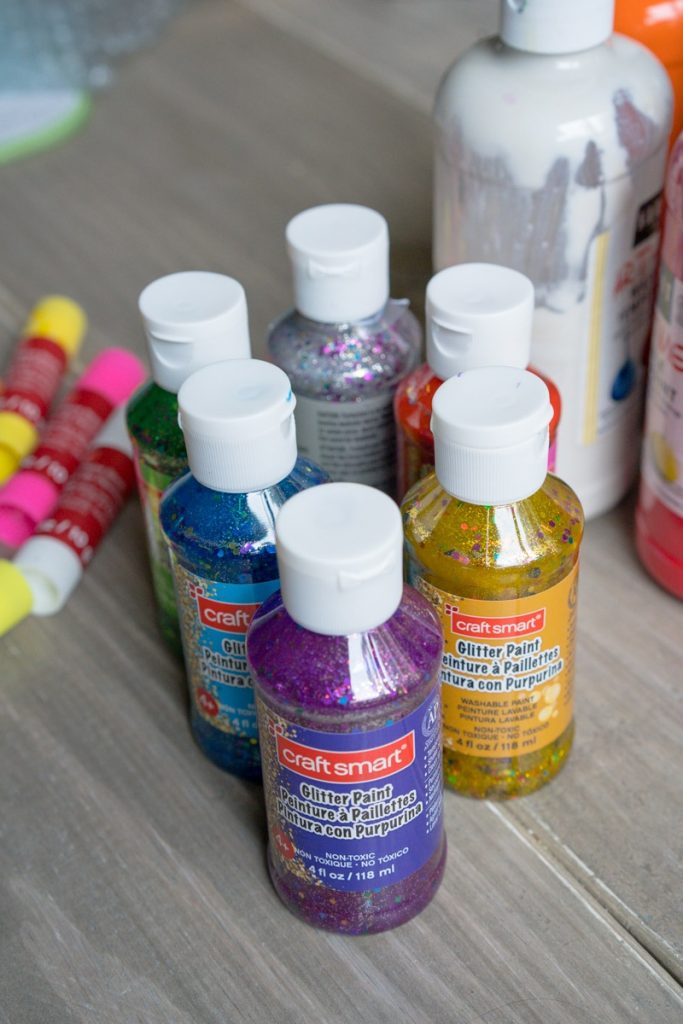
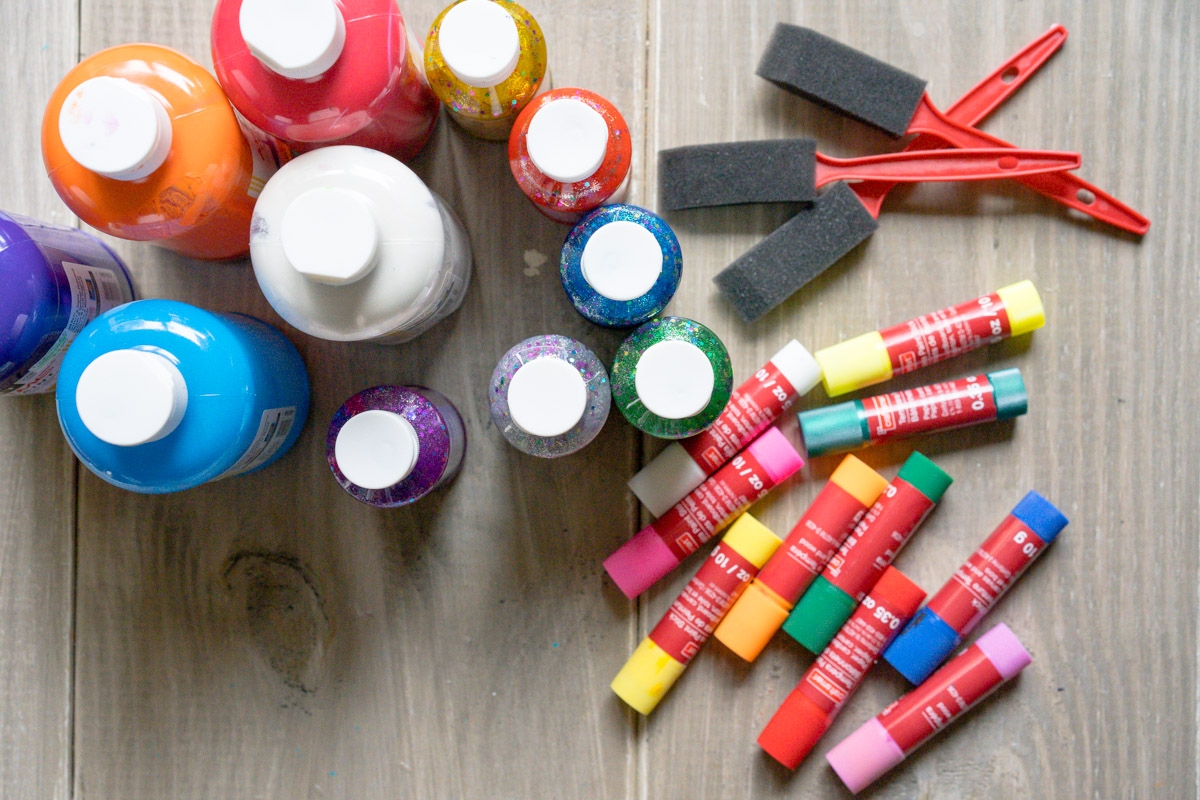
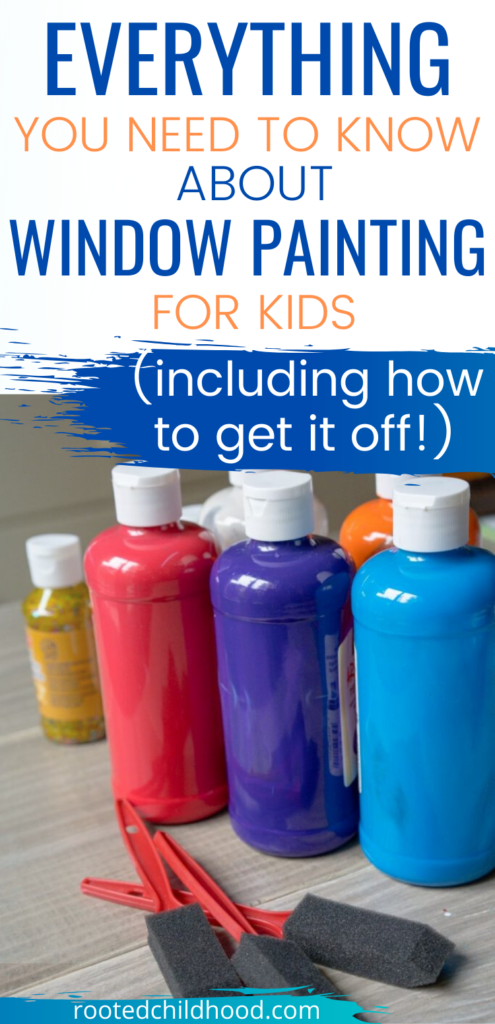
Obviously you’ll need paint. Washable tempera paint from the craft store is ideal. My paint is at least 5 years old and works like a charm.
This year we also tried tempera paint sticks. These are fantastic for outlining or coloring in small areas (like our ornaments) but I wouldn’t use these for the whole project. These were also an amazing option for my 2 year old to “help” without making a huge mess.
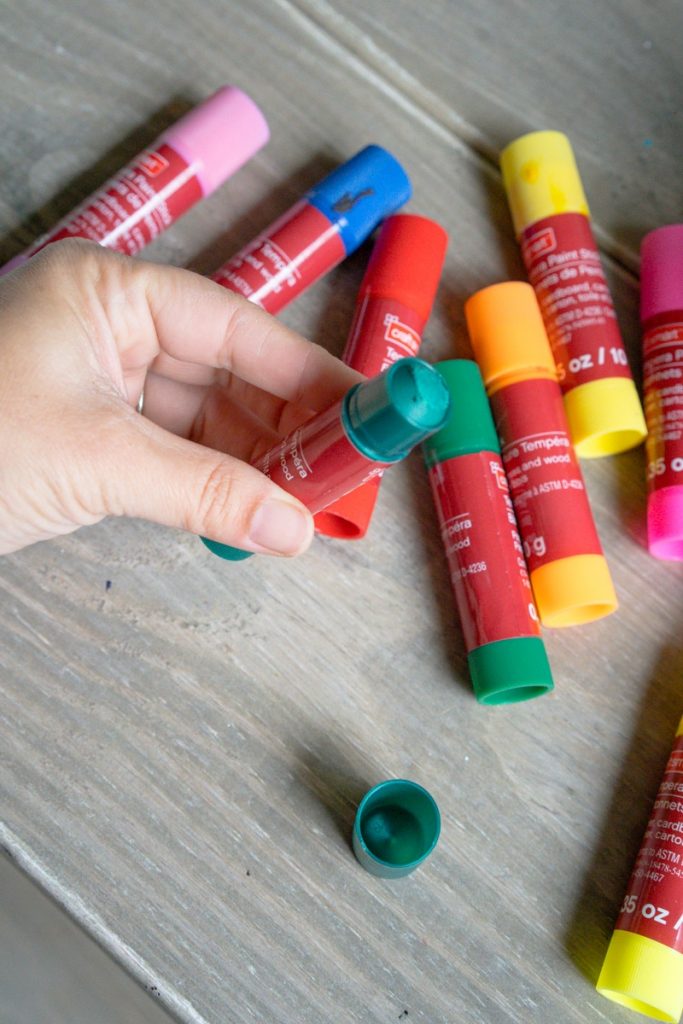
And because I have a fairy child, we used some glitter tempera paint also this year. This is best used in addition to another layer of paint because the color is very translucent.
Foam brushes in a variety of sizes work great for applying the paint. You’ll also need a palette, paper plate, or cups to contain the paint.
You also need dish soap to add to the tempera paint. I’ve used Dawn and natural dish soaps and both work great.
Depending on your level of OCD, you may want to use painter’s tape to protect any areas you don’t want paint including the windowsill. Use a drop cloth or disposable tablecloth on the ground to protect from splatter and drips.
Window Painting for Kids
Materials:
- tempera paint
- dish soap
- foam paint brushes
- disposable cups
- paper towel
Instructions:
Squirt a small amount of dish soap into a disposable cup and add about 1/4 cup of tempera paint. Mix thoroughly with a foam paint brush.
Apply to window in a single layer using long brush strokes. If a second coat is desired, wait until the first layer is completely dry.
Wipe up any spills immediately with a wet paper towel.
Enjoy your window painting!
How to Wash Off Window Paint
Washing off the window paint is about as daunting as you would expect! It’s a process, but in our house we like to say “many hands make light work.” It’s a great activity for little hands to help with.
We’ve left our window painting up for about a month; I can’t say how the cleaning process would be if you leave it up longer than that.
If you are concerned with your walls or window sills, be sure to tape them up again with painter’s tape. The clean up can be just as messy as the painting!
We try to avoid using paper towels in our house, but this is one project that deserves its own roll. I fill a few spray bottles with dish soap and water and let the kids spray and wipe. A looooot of spraying and wiping.
I let the kids to the first pass at it, but when it was time to use a little elbow grease I took over so that we didn’t end up with a broken window.
Once the majority of the paint was gone, I switched to glass cleaner to finish the job.
And then it was all just a memory. Until next year!

I love this idea! I remember when I was young, my dad would paint a holiday scene on our front picture window, and it brightened up the holidays! I never even thought of letting my kiddoes loose on the windows, but they would LOVE it!
Such a sweet memory!